.png?fit=max&auto=format&n=A6eJvszAoL83-A7S&q=85&s=ab172e8360b4303be4b8af2487703d0c)
Templates Overview
A template sets the physical product: size, bleed, spine and page count. Each template holds one or more designs, the ready-made artwork customers start from. Go to Sidebar > Products > Templates.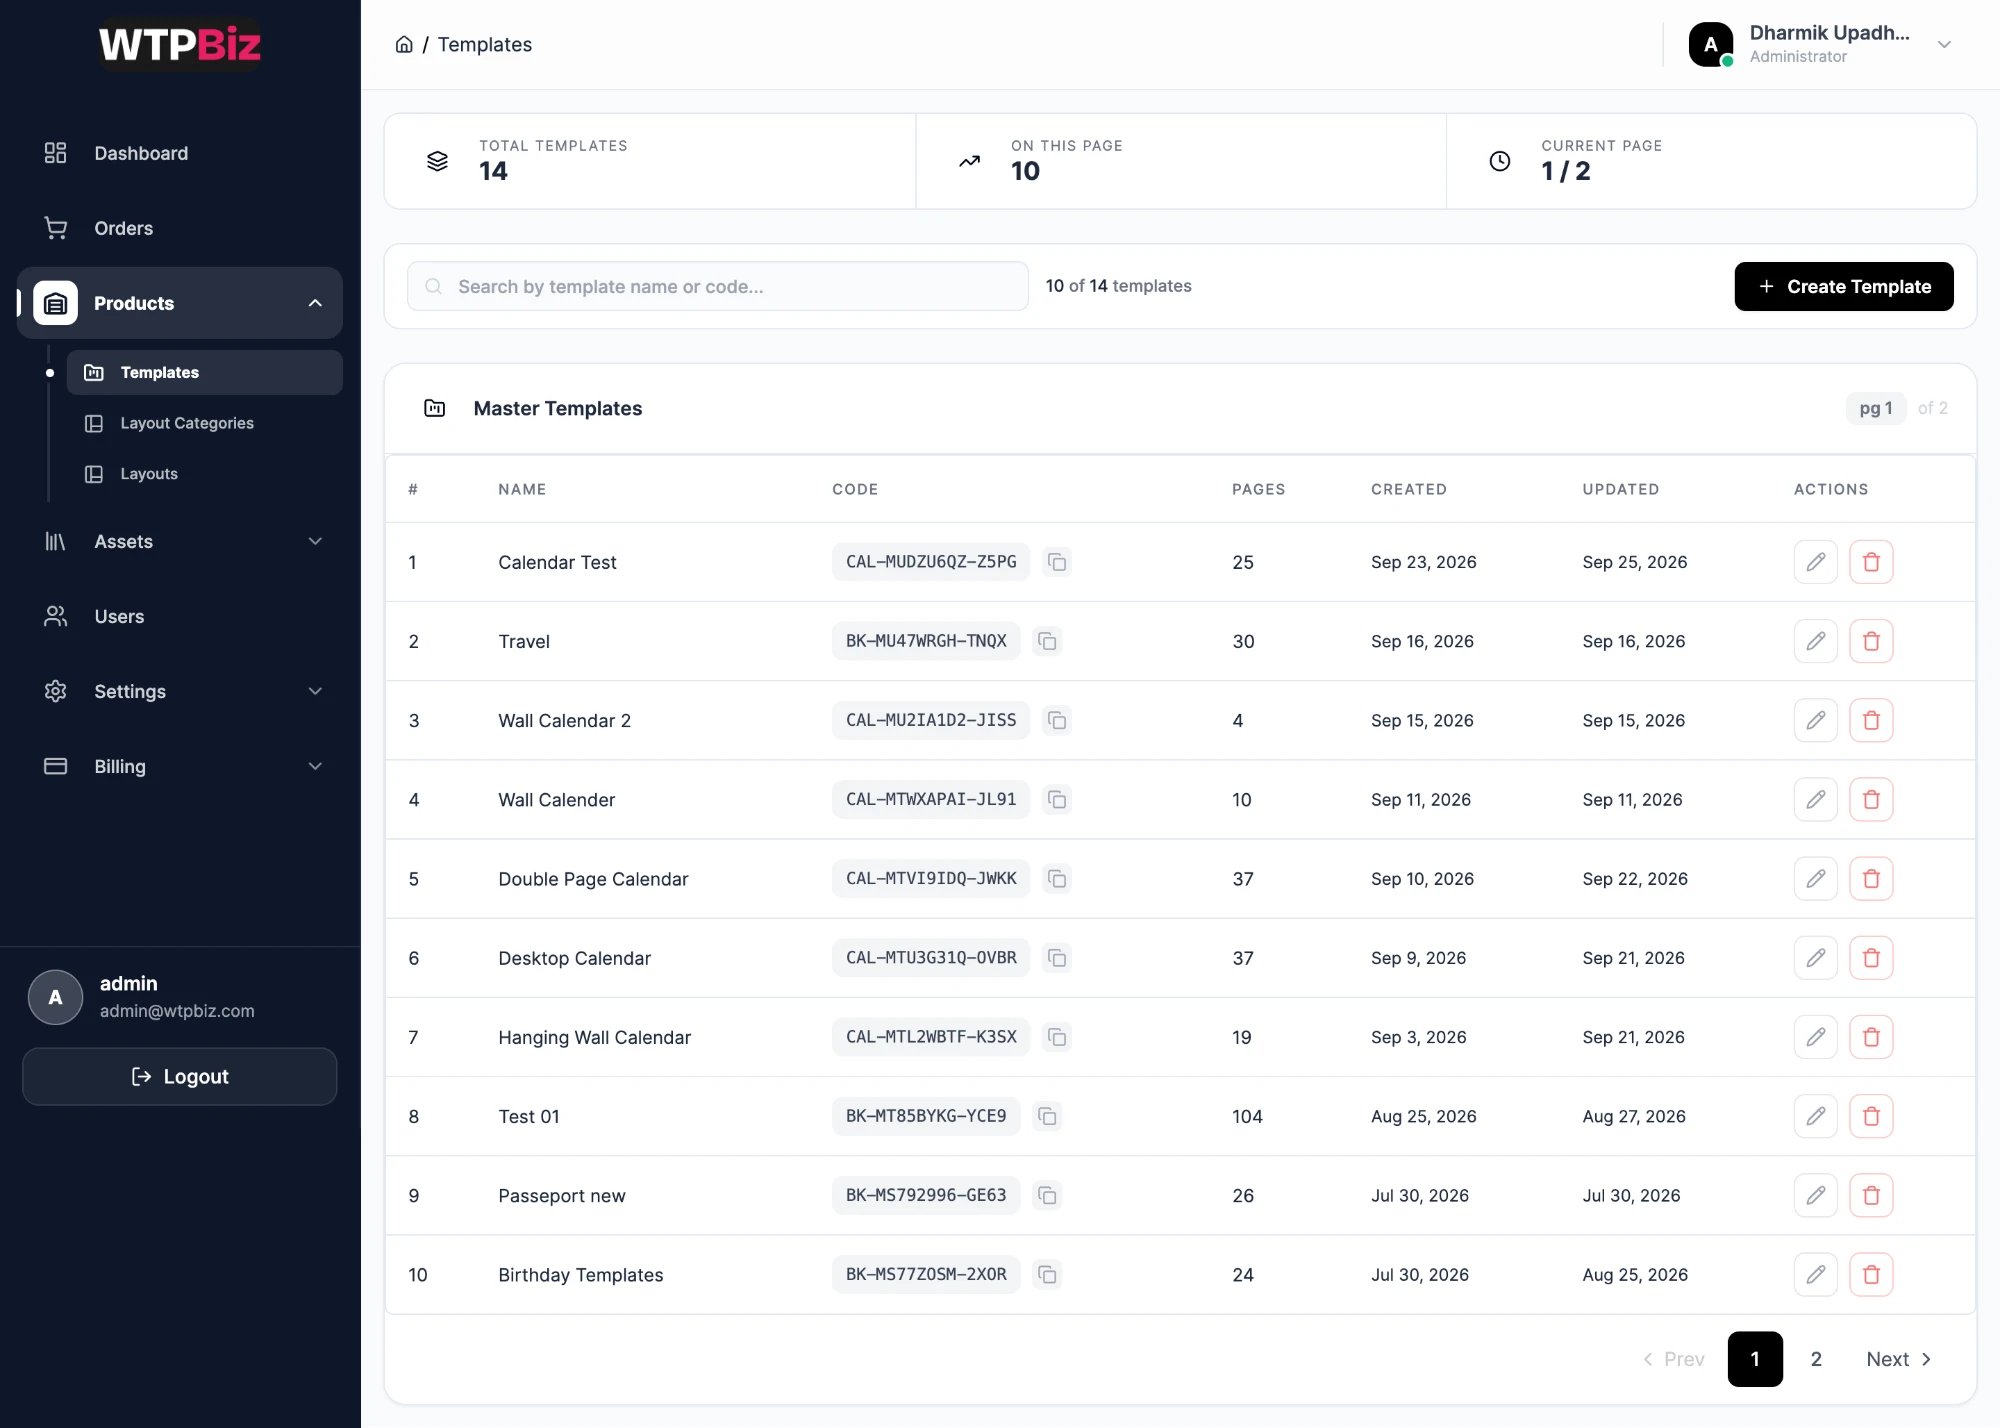
- Search — find a template by name or code.
- Create Template — create a new photo book or calendar template.
- Master Templates — name, code, page count and dates. Codes starting with
BK-are photo books andCAL-are calendars. Use the pencil to edit and the bin to delete.
Create a Photo Book Template
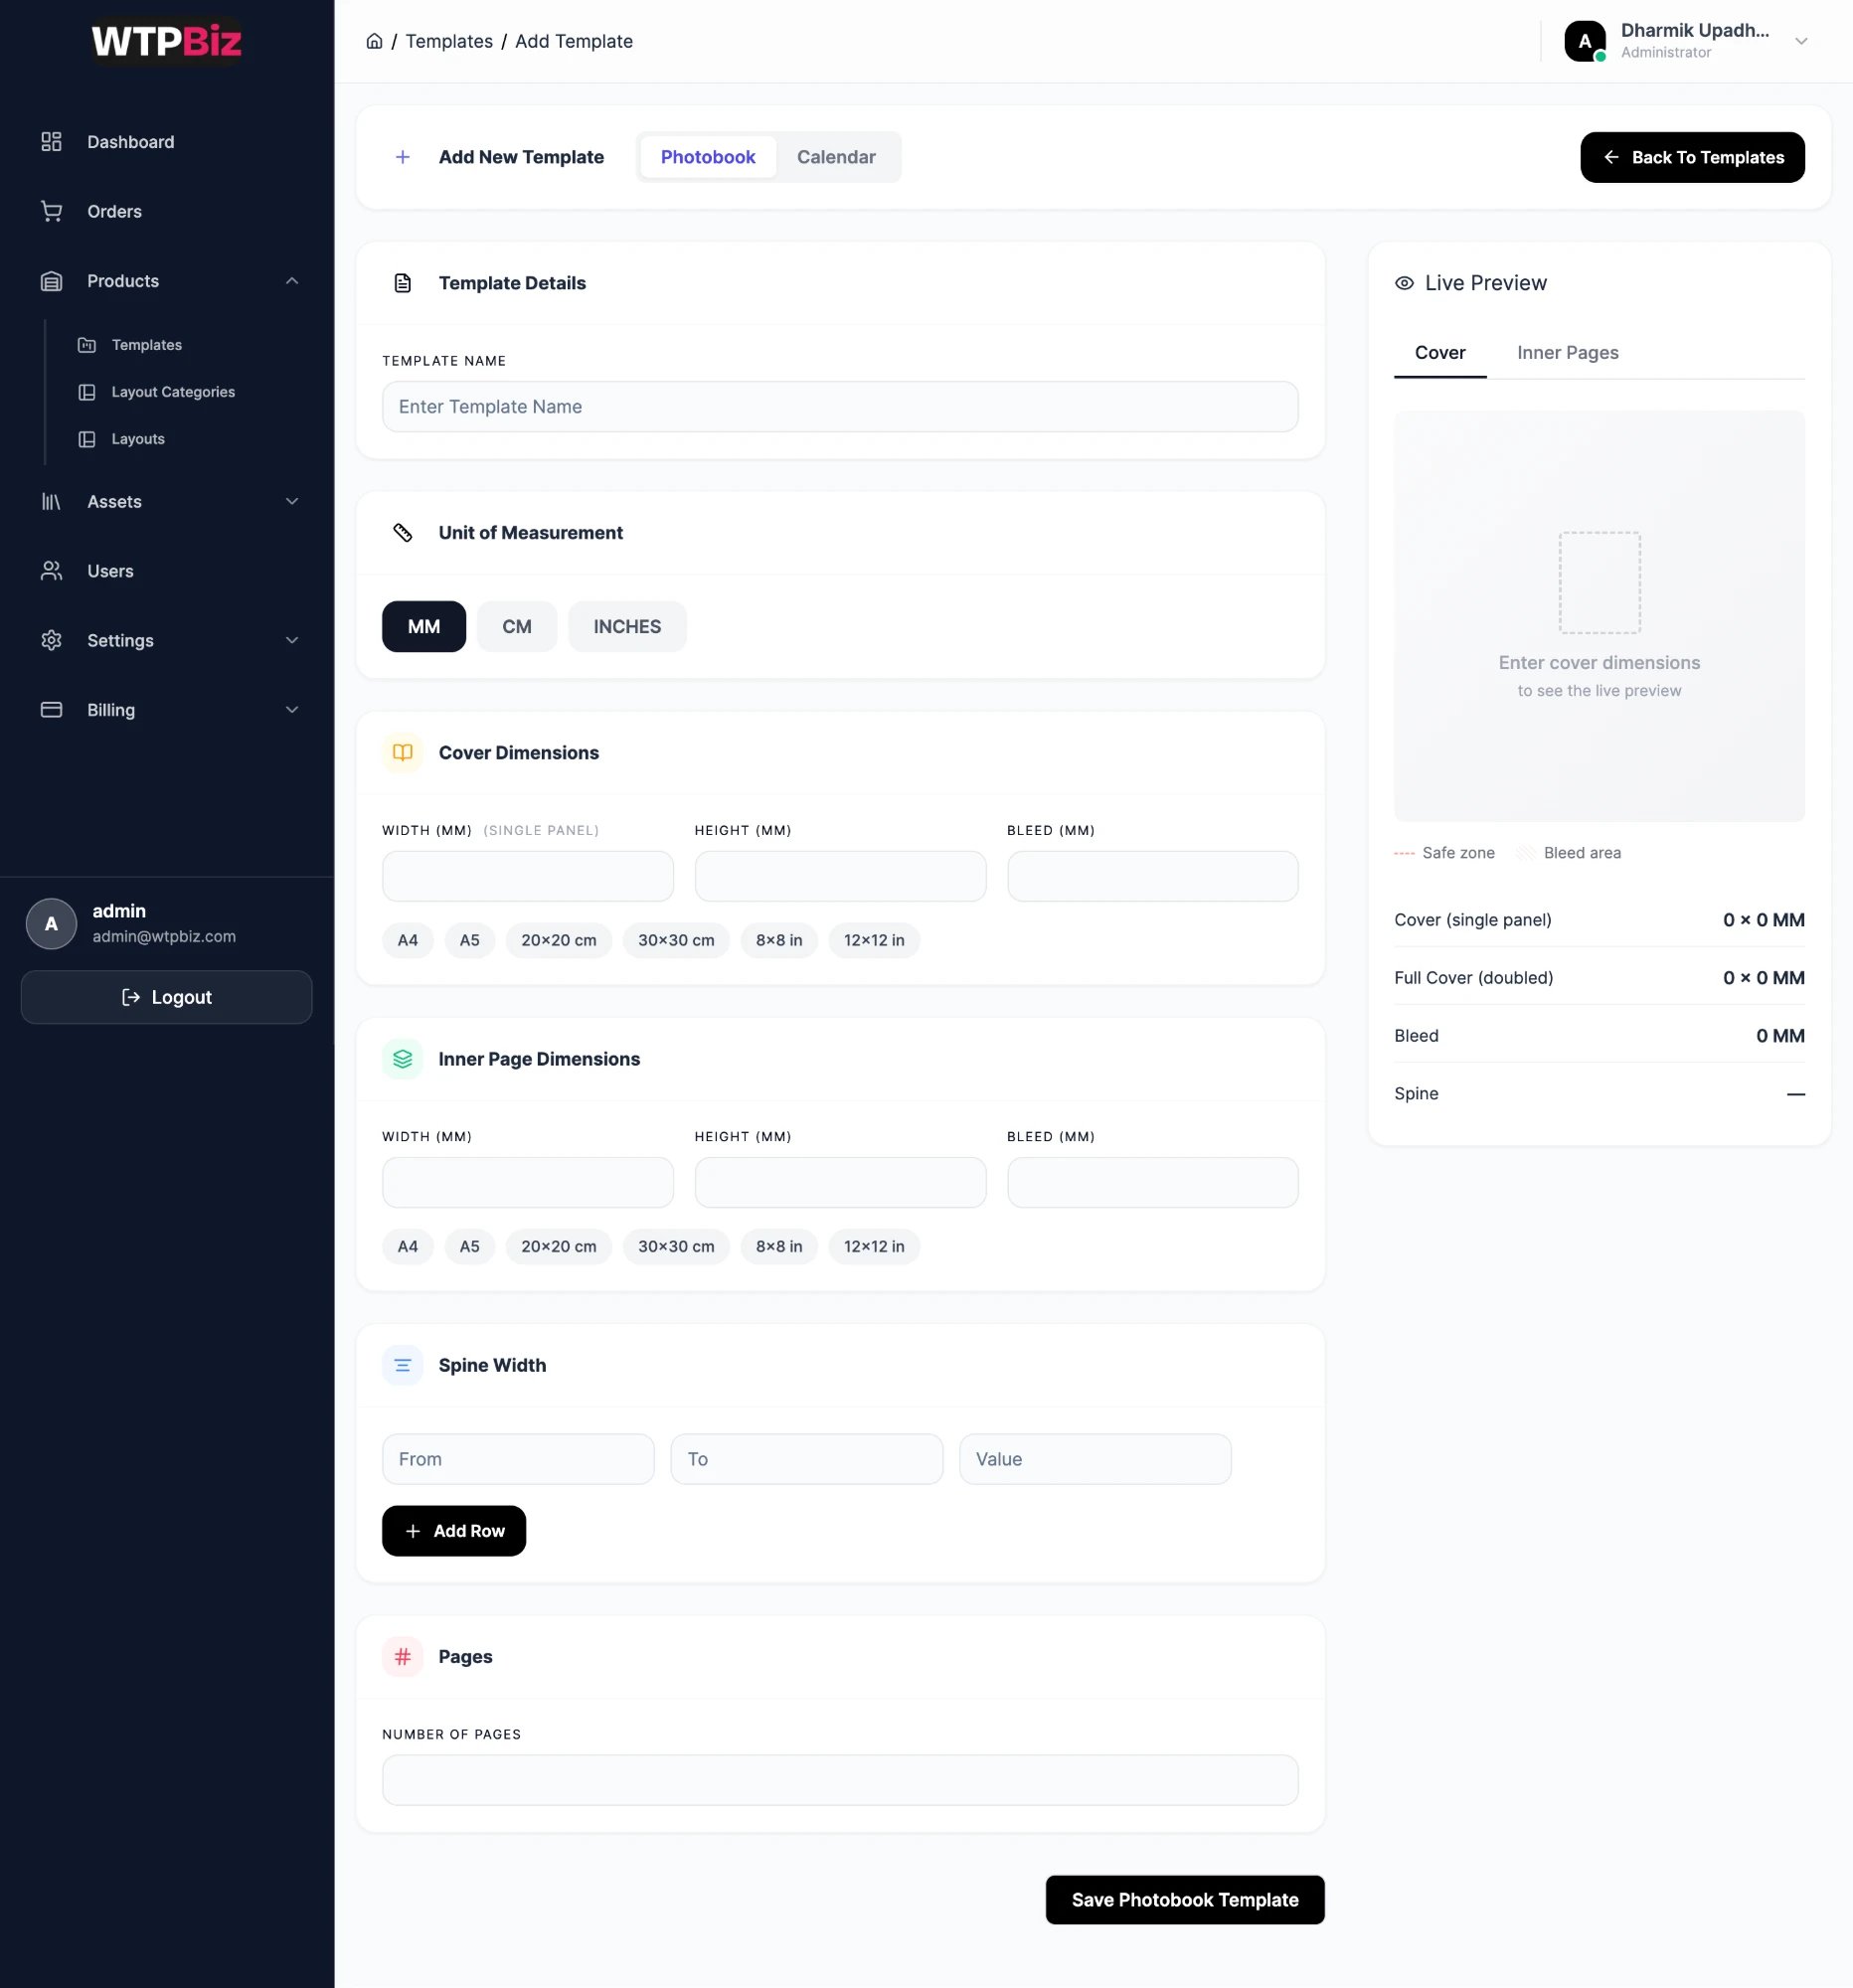
- Click Create Template and select Photobook.
- Enter a Template Name.
- Choose the Unit of Measurement: MM, CM or INCHES.
- Set Cover Dimensions: width of one cover panel, height and bleed. Presets are available (A4, A5, 20×20 cm, 30×30 cm, 8×8 in, 12×12 in).
- Set Inner Page Dimensions: width, height and bleed of a single page.
- Add Spine Width rows: From pages, To pages and the spine Value. Add one row per page range so thicker books get a wider spine.
- Enter the total number of Pages, cover included.
- Check the Live Preview, then click Save Photobook Template.
Use your printer’s specifications for sizes, bleed and spine widths.
Edit a Template and Add Designs
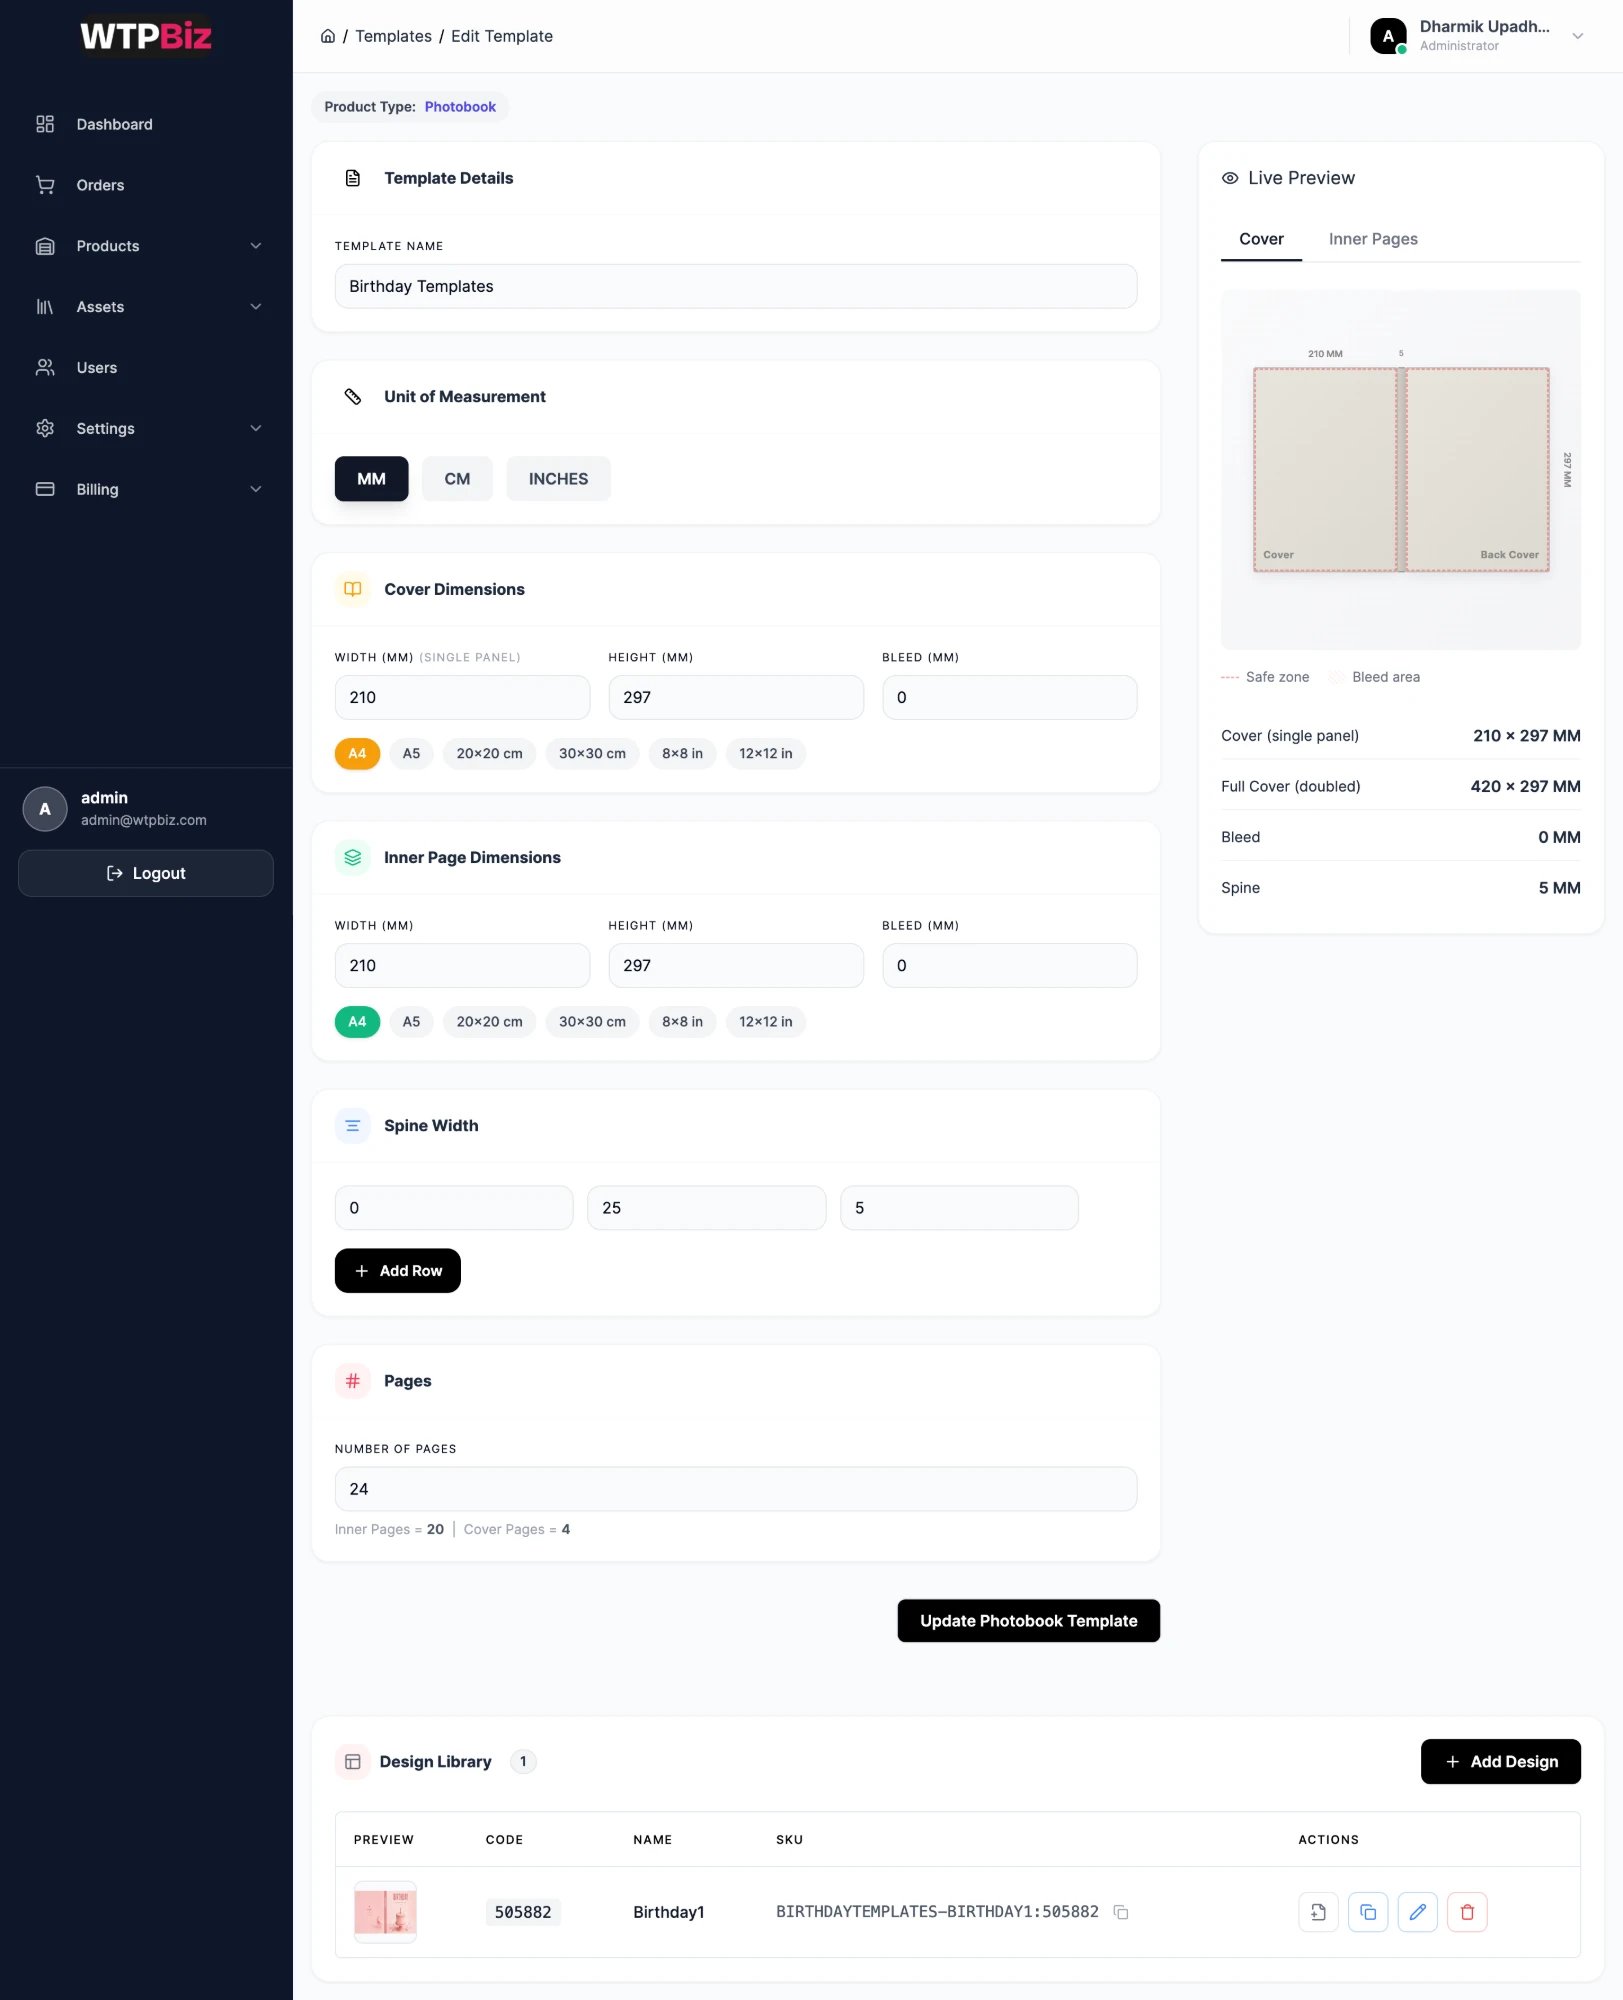
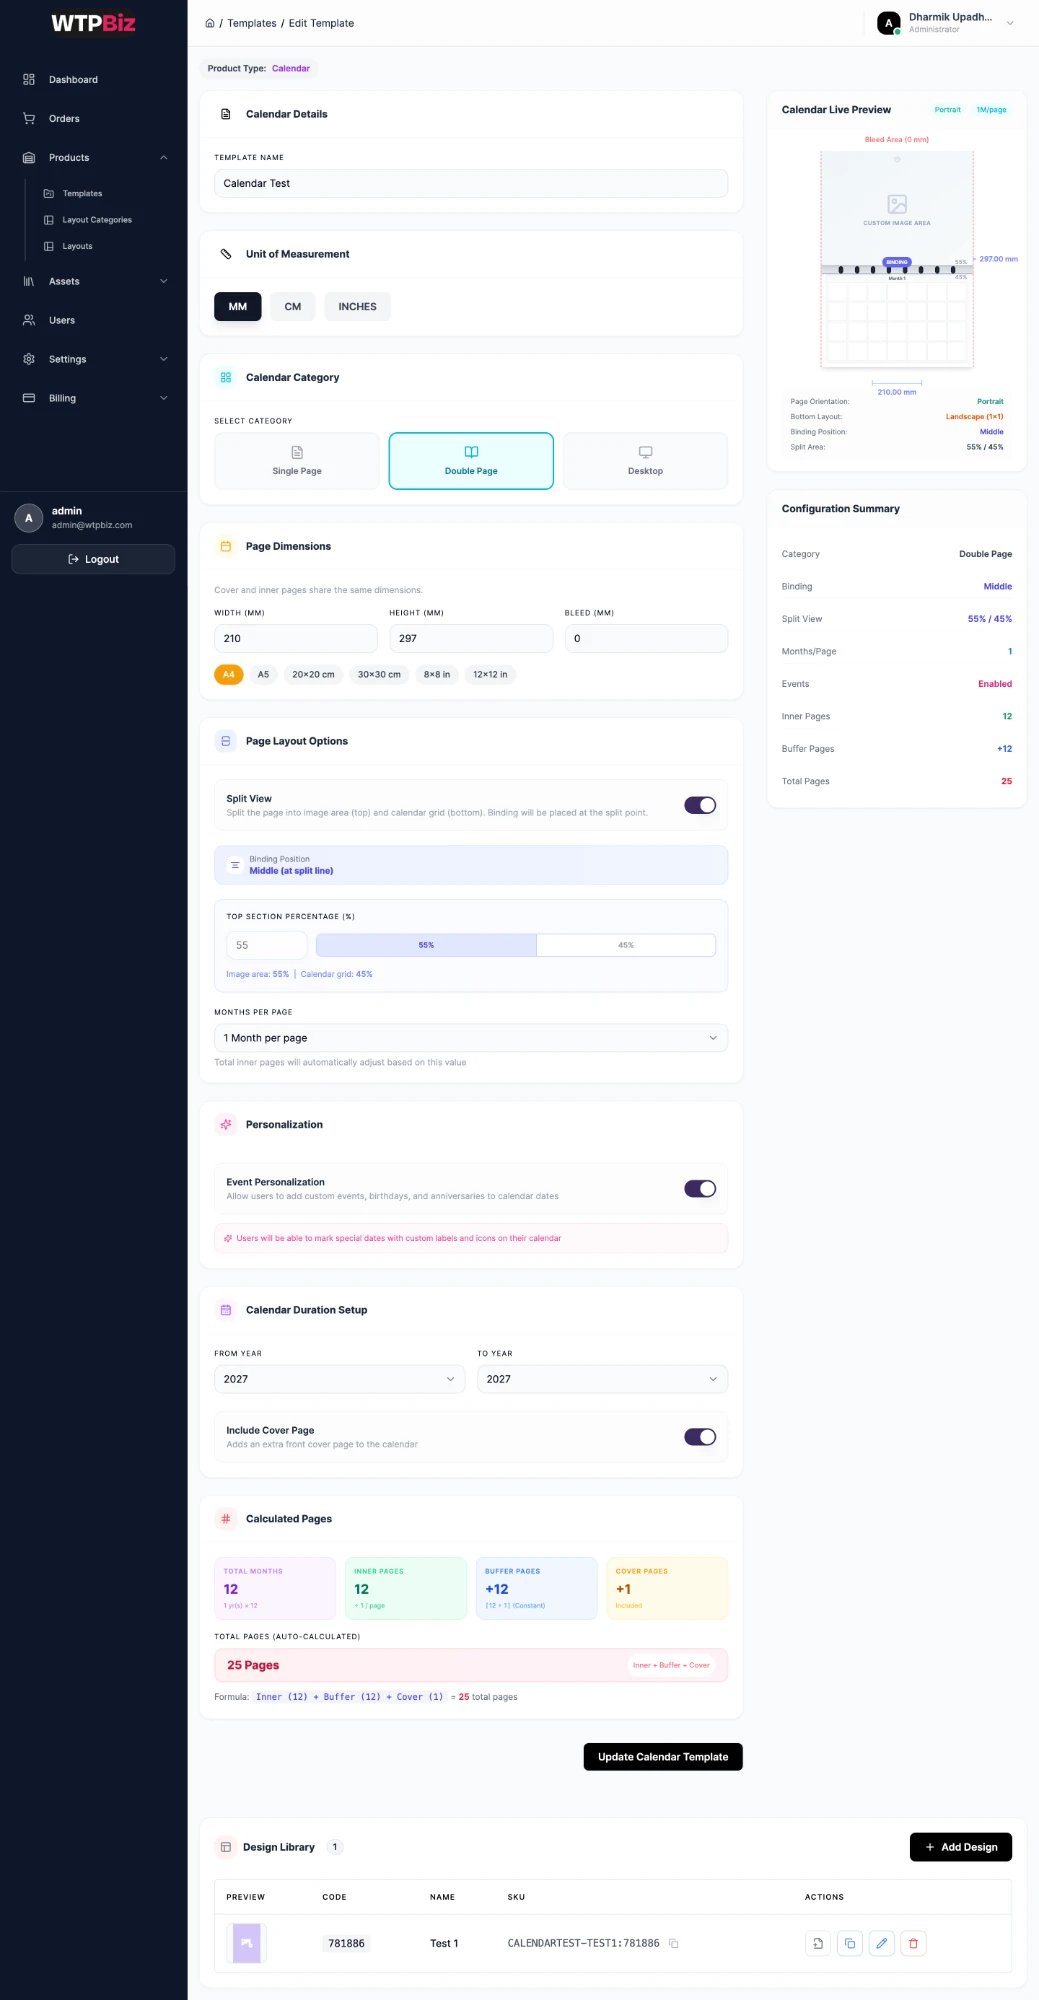
- Live Preview — shows the full cover as back cover + spine + front cover.
- Design Library — every design built on this template, with preview, Code, Name and SKU. Use the icons to open a design in the editor, duplicate, edit details or delete.
- Add Design — create a new design.
TEMPLATE-DESIGN:CODE, for example BIRTHDAYTEMPLATES-BIRTHDAY1:505882. Use the copy button to copy it. The same SKU appears on orders.
Photo Book Design Editor
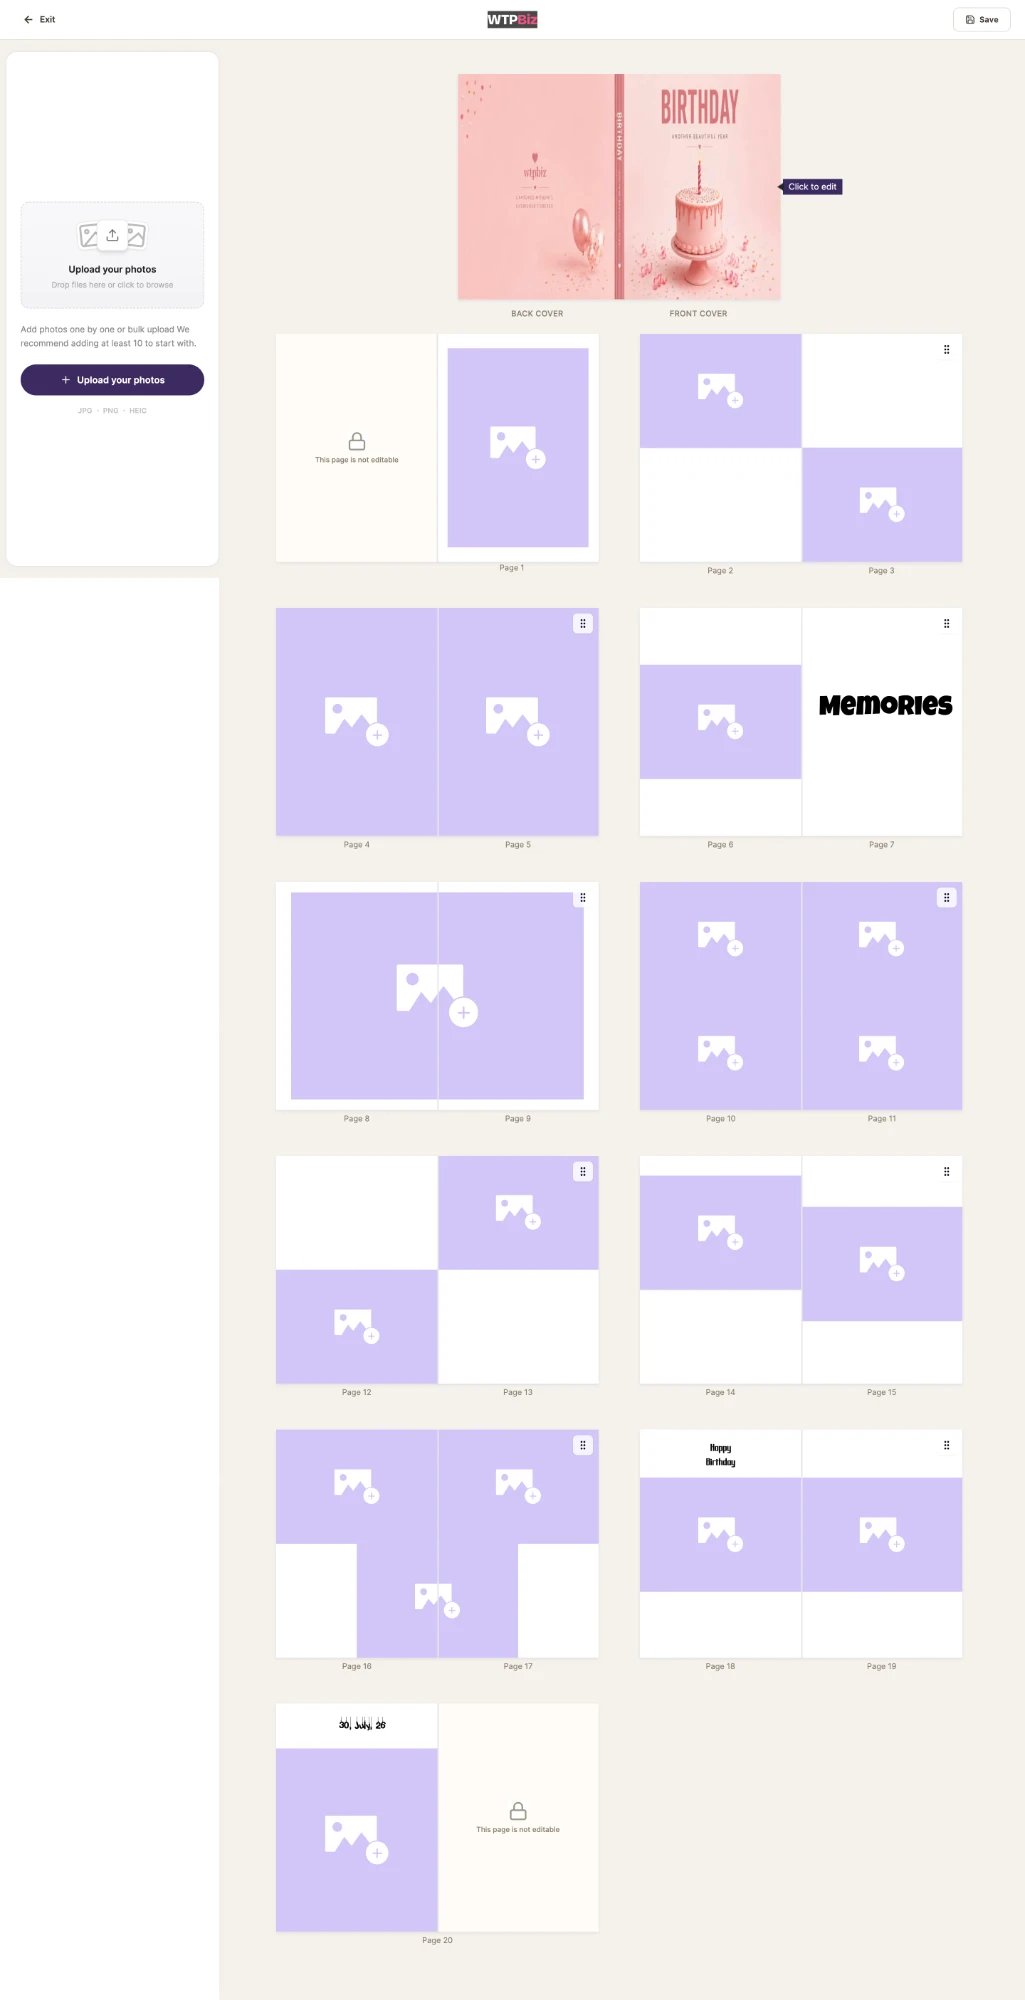
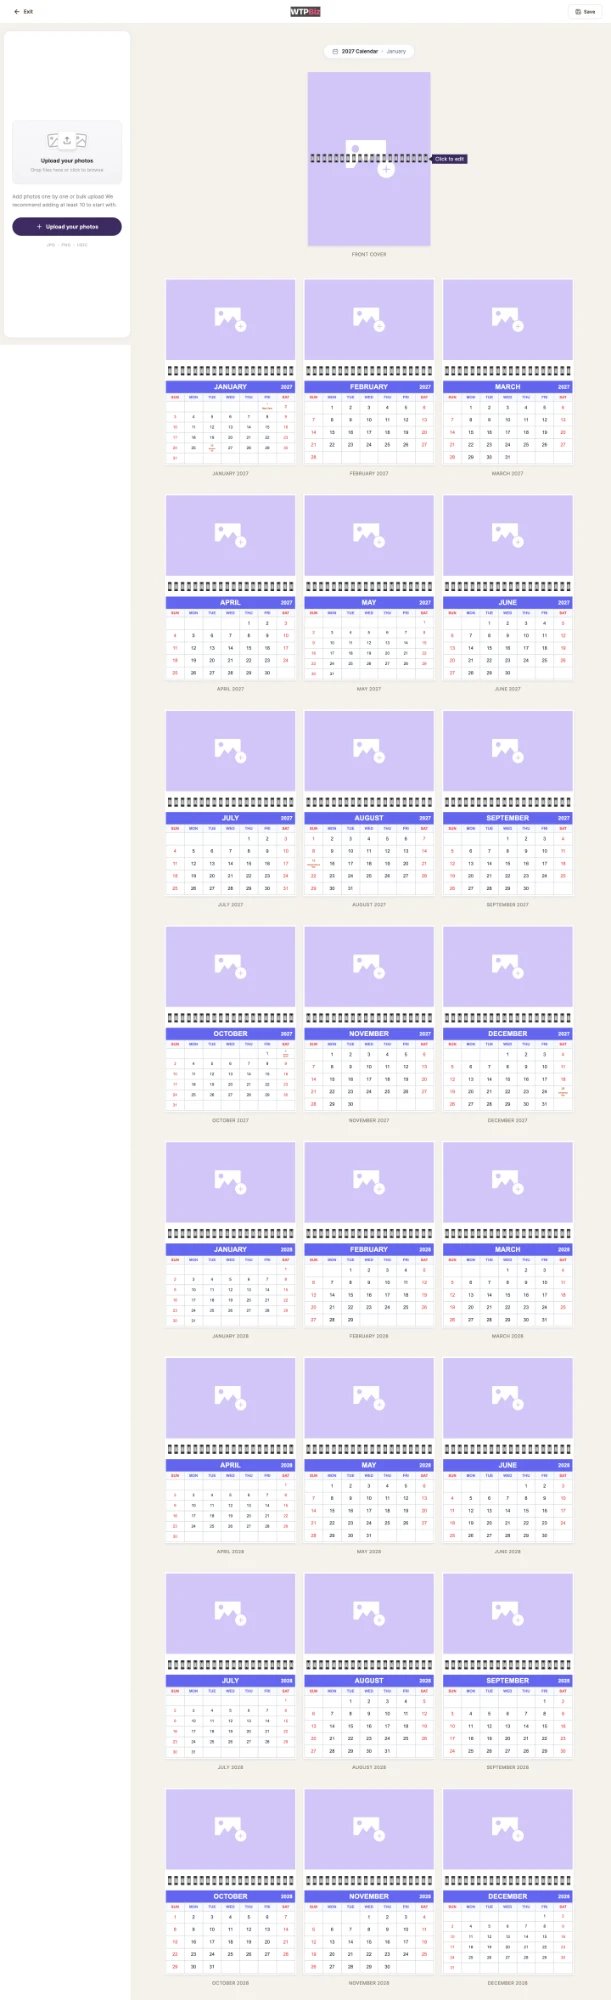
- Upload panel — drag and drop or click to add photos (JPG, PNG or HEIC).
- Cover — back cover, spine and front cover shown together. Click to edit the cover artwork and text.
- Spreads — inner pages shown as two-page spreads. Click + in a photo slot to add a photo. Text blocks can be edited.
- Locked pages — pages marked “This page is not editable” cannot be changed by customers.
- Click Save at the top right to save the design.
Create a Calendar Template
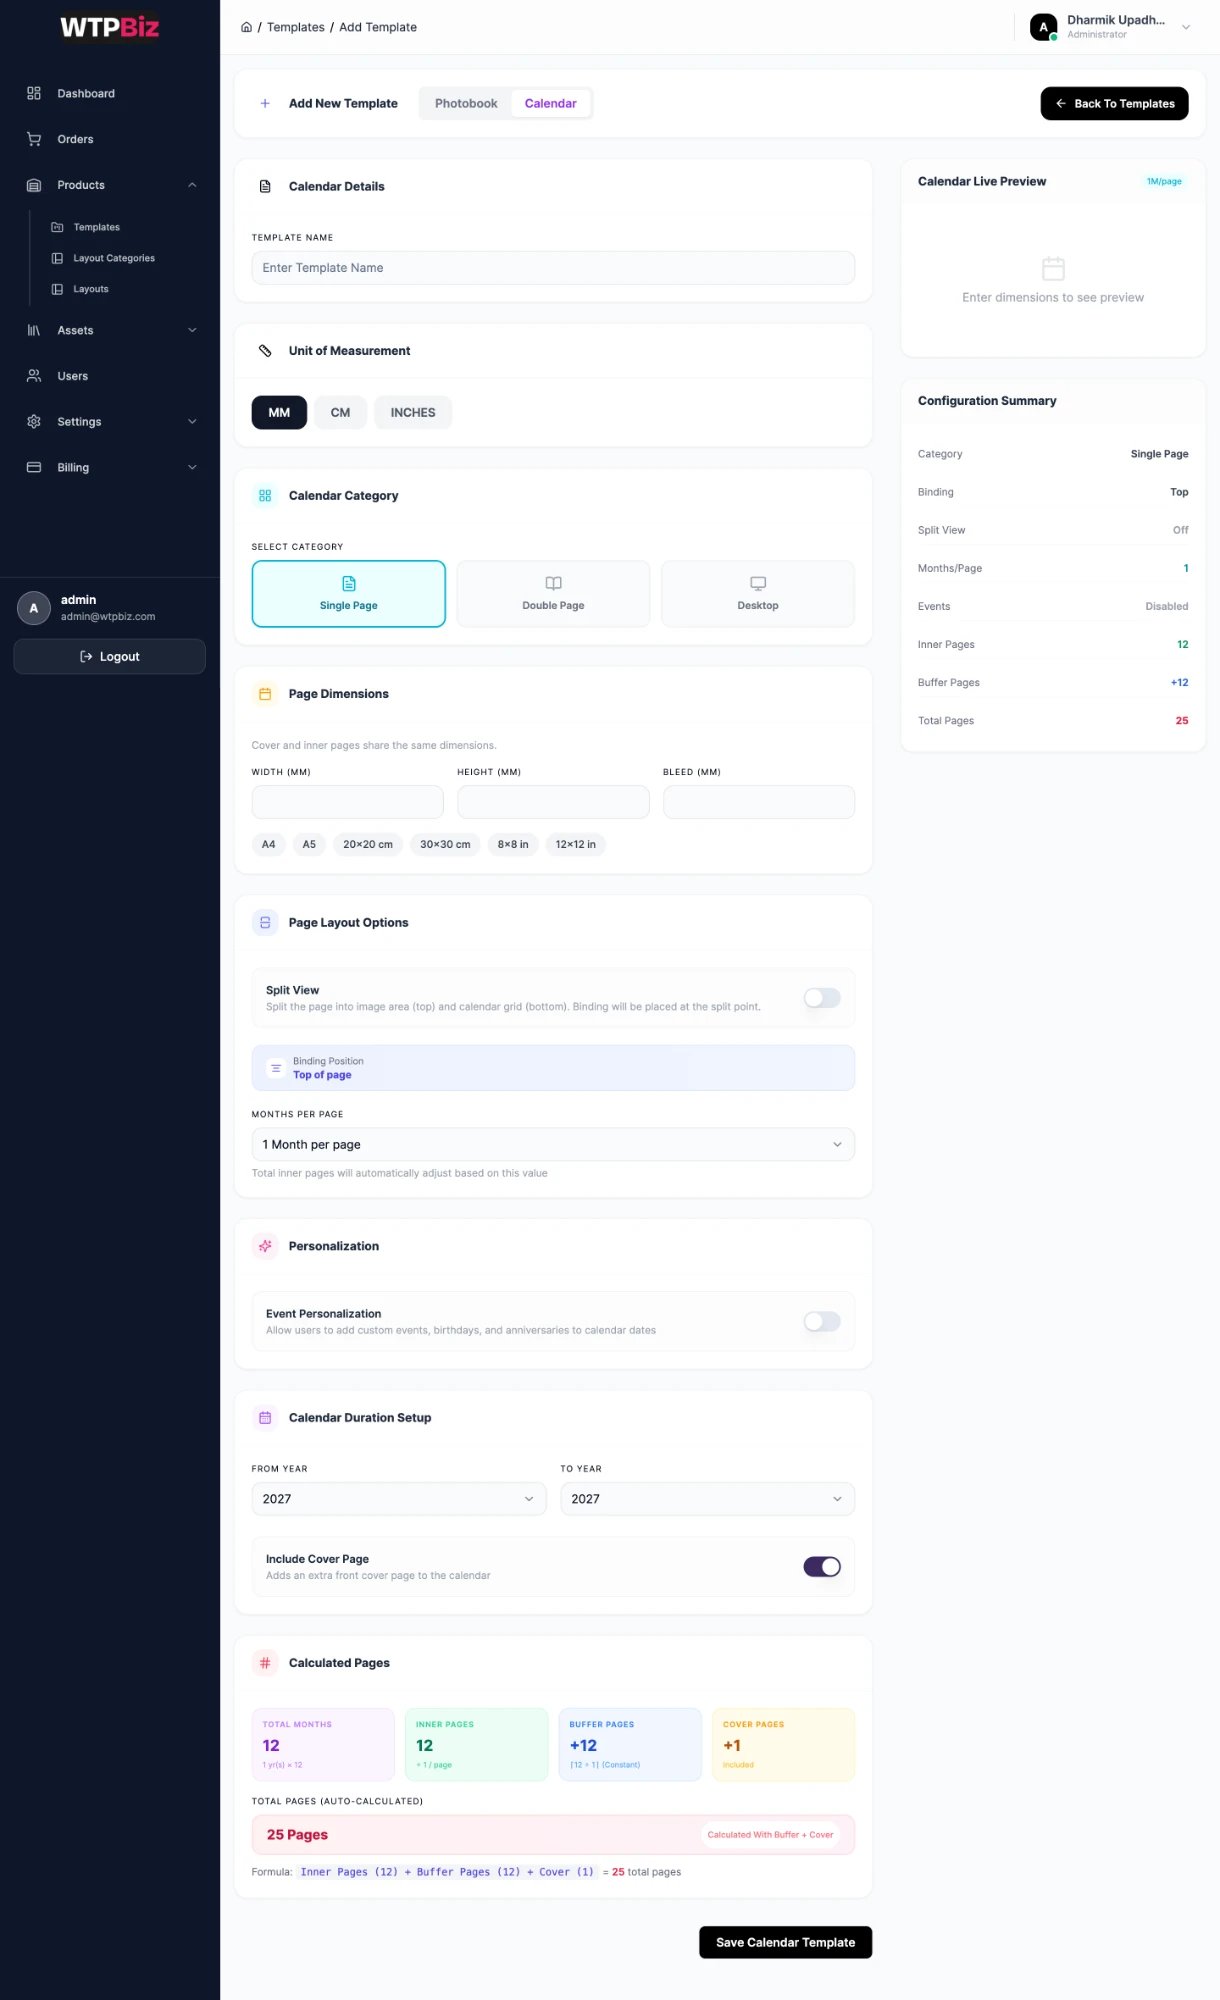
- Click Create Template and select Calendar.
- Enter a name and choose the unit of measurement.
- Choose the Calendar Category: Single Page (wall calendar, one sheet per month), Double Page (photo sheet above the grid sheet) or Desktop (desk stand).
- Set the Page Dimensions (cover and inner pages share one size).
- Set Page Layout Options: Split View divides a page into a photo area and a calendar grid. Months Per Page sets how many months each page holds.
- Turn on Event Personalization to let customers add birthdays and other events.
- Set the From and To year and choose whether to Include Cover Page.
- Check Calculated Pages and the Configuration Summary, then click Save Calendar Template.
Edit a Calendar Template
Calendar Design Editor
Link a Shopify Product
- Create the product in Shopify.
- Copy the design SKU from the template’s Design Library.
- Connect the product to the design SKU.
- Add the Personalize button to the product page. See Integration.