.png?fit=max&auto=format&n=A6eJvszAoL83-A7S&q=85&s=ab172e8360b4303be4b8af2487703d0c)
Overview
Photobook Designer connects to your store in the Shopify theme editor. There are two steps, both done under Online Store > Themes > Customize:- Turn on the Photobook Designer app embed (once per theme).
- Add the Personalize Button block to your product template.
Step 1: Turn On the App Embed
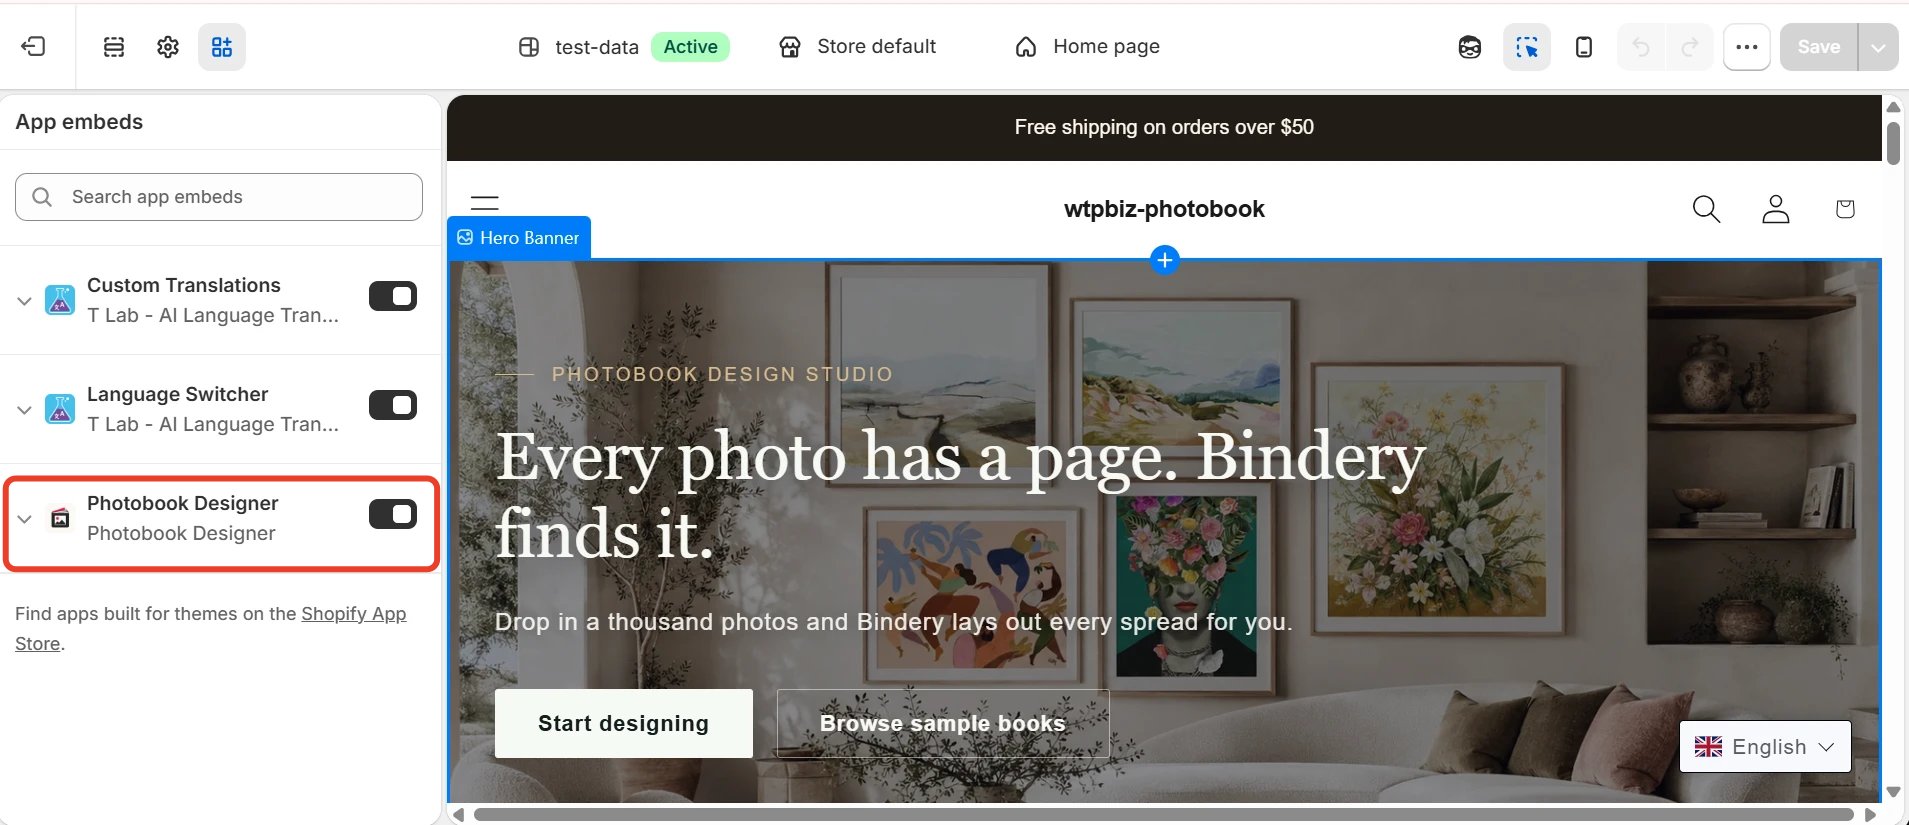
- In your Shopify admin, go to Online Store > Themes.
- Click Customize on your active theme.
- Click the App embeds icon in the left toolbar.
- Switch Photobook Designer on (highlighted).
- Click Save.
The app embed loads the designer on your storefront. Without it, the Personalize button does nothing.
Step 2: Add the Personalize Button
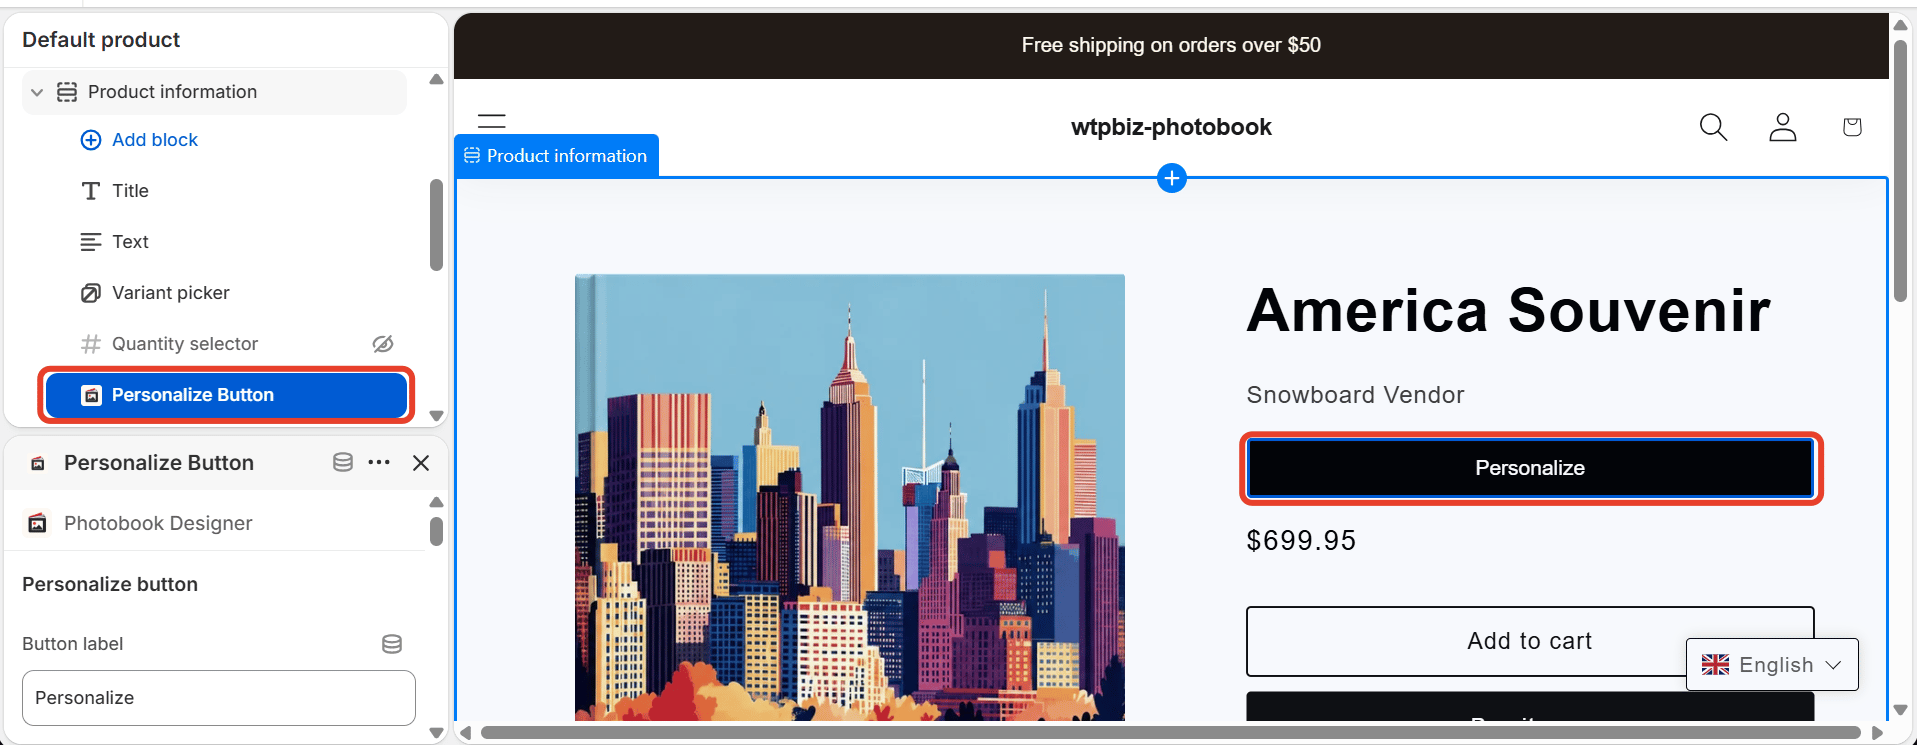
- From the page selector at the top of the theme editor, choose Products > Default product (or the product template you use for photo books).
- Under Product information, click Add block > Apps > Personalize Button (Photobook Designer).
- Drag the block to where the button should appear, for example under the variant picker and above the price.
- Select the block to open its settings. Button label sets the button text, for example “Personalize”.
- Click Save.
Verify the Integration
Open the product page on your live store and confirm the Personalize button is visible and opens the editor. If it does not appear, check that:- The Photobook Designer app embed is switched on and saved.
- The Personalize Button block is on the product template the product uses.
- The product is linked to a design SKU from the Design Library. See Templates.